Mastering Hand-Lettered Design with the Procreate Letter Builder and Lettering Grid
For many digital artists, the gap between having a great idea for typography and executing it cleanly on an iPad can feel frustratingly wide. You might have a vision for a bold, serif-heavy quote for Instagram, but your freehand lines wobble, or your spacing feels off. This is where specialized tools like the Procreate Letter Builder and Lettering Grid set change the game. It is not just about downloading another brush; it is about integrating a structured workflow that bridges the gap between amateur sketching and professional-grade lettering.
This resource is designed for creators who want precision without losing the organic feel of hand-drawn text. Whether you are a small business owner designing your own logo, a teacher creating engaging worksheets, or a hobbyist looking to elevate your journaling, understanding how to leverage these specific grids and brushes can save hours of frustration.
Why Structure Matters in Digital Lettering
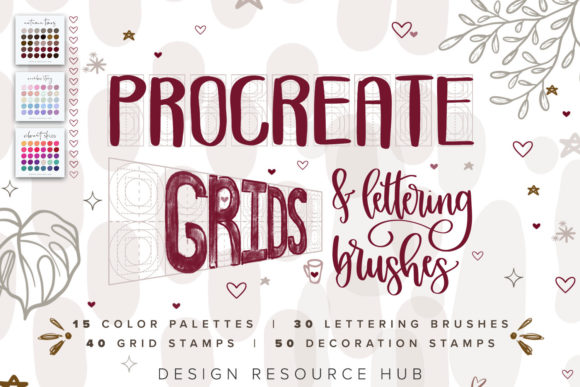
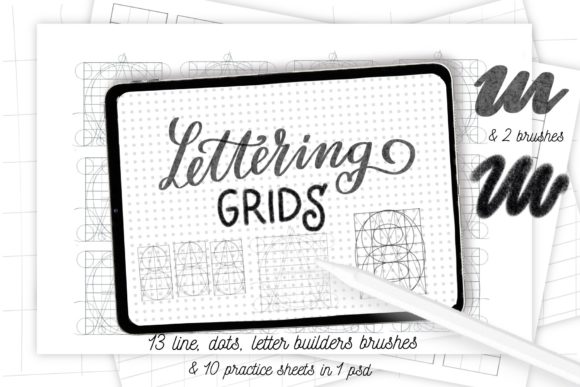
One of the biggest misconceptions about digital art is that it should be entirely freeform. However, consistent lettering relies heavily on structure. The Procreate Letter Builder and Lettering Grid package addresses this by providing thirteen distinct grid brushes within a single brushset. These are not generic backgrounds; they are functional guides.
Consider the difference between a dot grid and a checked grid. A dot grid offers subtle guidance for baseline and x-height without visually cluttering your final design, making it ideal for minimalist logos or social media graphics. In contrast, a line grid with clear ascender and descender markers is crucial when you are working on complex serif fonts that require strict vertical alignment. By having these options built directly into your brush library, you eliminate the need to import separate image files for guidelines every time you start a new project.
Real-World Applications for Different Creators
The versatility of this toolset means it serves various users differently. Here is how different professionals and hobbyists can integrate these resources into their daily workflows.
For Entrepreneurs and Marketers
If you run a small business, you likely wear many hats, including graphic designer. Creating branded content for social media often requires quick turnaround times. Using the san-serif bold letters included in the builder set allows you to draft impactful headlines rapidly. You can use the grid to ensure your text aligns perfectly with your brand’s visual identity. Instead of struggling with vector software on a desktop, you can sketch, refine, and export a polished typographic piece directly from your iPad during a coffee break.
Educators and Content Creators
Teachers and online course creators often need to produce custom materials that feel personal and approachable. Standard computer fonts can feel cold and impersonal. With the grainy pencil bonus brush, educators can create worksheets or presentation slides that mimic the warmth of handwritten notes. The lettering grids help maintain readability, ensuring that educational content remains clear while retaining a human touch. This is particularly useful for language teachers demonstrating stroke order or for designers creating printable planners.
Hobbyists and Journalers
For those using Procreate for digital planning or bullet journaling, the aesthetic is everything. The serif letters and calligraphy brush allow for elegant headers and decorative elements. The inclusion of a PSD file with ten ready-to-practice grids means you can print these out for traditional practice or load them as layers in Procreate for digital tracing. This dual utility supports users who want to improve their muscle memory offline before applying those skills digitally.
Understanding the Toolkit: More Than Just Brushes
To get the most out of the Procreate Letter Builder and Lettering Grid, it is essential to understand what is included and how each component serves a specific purpose. The set includes eleven distinct grid types, ranging from simple checkered patterns to specialized letter-building guides. These grids act as the skeleton for your typography.
The brush components are equally critical. The set features san-serif thin and bold options, which are perfect for modern, clean designs. The serif options add a classic, authoritative tone to your work. Additionally, the two bonus brushes—a grainy pencil and a brush calligraphy tool—provide texture and flair. The grainy pencil is excellent for sketching initial concepts because it mimics the friction of paper, giving you more control than a slippery digital stylus might otherwise offer.
A key consideration before purchasing or downloading is your technical setup. This brushset is optimized for newer versions of Procreate. If you are using Procreate version 4.0 or earlier, the standard brushset file may not be compatible. This is a common hurdle for users with older iPads who have not updated their operating system. Understanding this limitation beforehand saves time and ensures you can access the full functionality of the tool.
Installation and Setup Guide
Getting these tools into your workspace is straightforward, but the method varies depending on your device and software version. For most users with updated devices, importing the .brushset file is the quickest route. However, if you are on an older iPad or using Procreate 4.0 or earlier, you will need to use the individual .brush file method.
Here is a practical guide to installing these brushes correctly:
- Download the files: Ensure the folder containing the
.brushor.brushsetfiles is saved to your iPad’s Files app or a cloud service accessible from your device. - Locate the file: Open the folder and identify the brush files you wish to install.
- Initiate the share menu: Tap and hold the file with your finger or Apple Pencil until a menu appears.
- Select Share: Choose the "Share" option from the contextual menu.
- Find Procreate: Look for "Open in Procreate." If this option is missing, click on "More," scroll through the list of apps, find Procreate, and select it.
- Verify installation: Open your project in Procreate and tap the brush icon in the top right corner. Your new brushes should appear in the imported section.
Alternatively, you can import directly within the app:
- Open Procreate and navigate to the Brush Library.
- Click on any category name to open the brush sets list, then tap "New Collection" or select an existing one.
- Tap the "+" icon or "Import" button.
- Navigate to the folder where you downloaded the brush files, select the desired
.brushfile, and it will be added to your collection immediately.
Making the Most of Your Practice
Owning the tools is only half the battle; using them effectively requires practice. The included PSD file with ten grids is a valuable asset here. Do not skip the practice phase. Use these grids to trace over established letterforms to understand the geometry of sans-serif and serif structures. Notice how the bold letters occupy space differently than the thin ones. Pay attention to the negative space between characters, which the grids help visualize.
Remember that digital lettering is iterative. Use the grainy pencil for your rough drafts, allowing yourself to make mistakes. Once the structure is sound, switch to the cleaner lettering brushes for the final pass. Layer your grids on top of your sketch initially, then lower their opacity or hide them completely once the letterforms are defined. This workflow ensures that your final output is polished while retaining the unique character of hand-lettered design.
By integrating the Procreate Letter Builder and Lettering Grid into your creative process, you are not just buying a set of brushes; you are adopting a system that promotes consistency, speed, and professional quality in your typographic work. Whether for commercial projects or personal joy, these tools provide the scaffolding needed to build confidence and skill in digital lettering.